



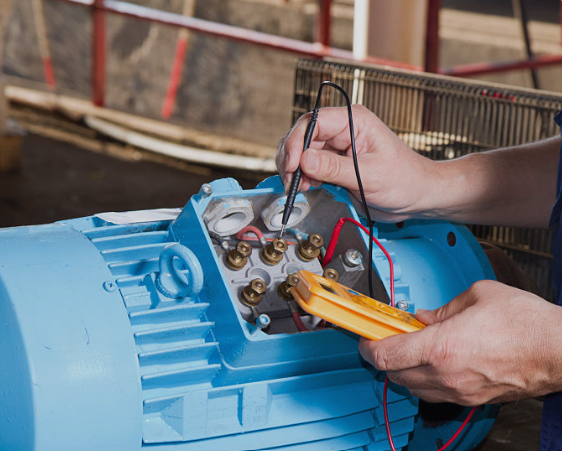
Electric motors are the silent workhorses of modern industry, powering everything from conveyor belts to critical pumps and compressors. Yet, they are often neglected until a failure occurs, bringing operations to a halt. A well-structured maintenance and testing program is not just about fixing what’s broken; it’s about ensuring reliability, optimizing efficiency, and extending the operational life of these vital assets. This guide provides a comprehensive overview of best practices, helping you move from reactive repairs to proactive asset management.
Why a Proactive Motor Maintenance Program Matters
Failing to properly maintain electric motors can have significant financial and operational consequences. Unplanned downtime is costly, and motor failures often have cascading effects on dependent equipment. A proactive program, encompassing both preventive and predictive maintenance, is a much better strategy than corrective maintenance performed after a breakdown .
Many industrial facilities struggle with a disconnect between mechanical and electrical teams, leading to motors being overlooked . Furthermore, a lack of proper training and clearly defined responsibilities can mean that critical tasks are not performed . To combat this, organizations must foster a culture of continuous improvement, where both the mechanical and electrical health of motors is a shared priority.
A robust maintenance strategy reduces unplanned downtime, lowers energy costs, extends equipment lifespan, and improves workplace safety by identifying electrical and mechanical hazards early .
Laying the Groundwork: Initial Inspection and Safety
Before any testing or maintenance begins, safety must be the absolute priority. Strictly follow Lockout/Tagout (LOTO) procedures to isolate the motor from all energy sources. Verify the motor is de-energized using a properly rated voltage tester and ensure capacitors are discharged before proceeding .
The Critical First Step: Visual Inspection
A thorough visual inspection can reveal a surprising amount of information. This simple step involves a careful examination of the motor and its environment.
Key elements to inspect:
- Exterior Condition: Check for physical damage, corrosion, cracked housing, and blocked cooling fins. Look for signs of oil or grease leakage.
- Terminal Box: Open and inspect for moisture, dirt, signs of overheating (discolored wires or insulation), and ensure all connections are secure .
- Mounting and Alignment: Verify that the foundation bolts are tight and assess the condition of the coupling or belt drive. Soft foot, a condition where the motor base is uneven, can cause misalignment and vibration, leading to premature bearing and shaft failure.
- Cooling System: Ensure fans and fan shrouds are clean and unobstructed. For water-cooled motors, confirm proper flow.
- Nameplate Data: Record all vital information from the nameplate (voltage, Full Load Amps [FLA], RPM, insulation class, service factor). This data is essential for analyzing test results .
Electrical Testing: The Core of Motor Condition Assessment
Electrical testing provides insights into the health of the motor’s most critical components: its windings and insulation system. A comprehensive approach often combines static (offline) and dynamic (online) testing.
Static (Offline) Testing
Performed with the motor de-energized, these tests evaluate the integrity of the motor’s insulation and windings . This is the foundation for verifying motor health and is a cornerstone of any predictive maintenance program .
Key Static Tests:
- Insulation Resistance (IR) Test (Megger Test): This test measures the resistance between the motor windings and the ground (motor frame). It is crucial for identifying contamination, moisture ingress, and insulation breakdown. A low IR reading is a warning sign that the insulation’s dielectric strength may be compromised .
- Polarization Index (PI) Test: An extension of the IR test that measures the resistance over a 10-minute period, comparing the 10-minute reading to the 1-minute reading. The resulting PI ratio provides a deeper insight into the condition of the insulation system, particularly identifying dry, brittle insulation that may not be detected by a single IR test . A PI ratio greater than 2.0 generally indicates healthy insulation .
- Winding Resistance Test: Measures the DC resistance of each phase winding. Comparing the resistance of all three phases can identify imbalances, which may point to loose connections, open circuits, or faulty coils. An imbalance of more than 2-5% signals a problem .
- Surge Comparison Test: This is the definitive test for detecting turn-to-turn insulation faults. It applies a high-voltage, fast-rising pulse to the windings and compares the resulting waveform pattern across phases. A mismatch in these patterns indicates a short between turns, a type of fault that accounts for over 80% of winding-related failures and is often missed by DC tests .
- High Potential (Hi-Pot) Test: This test applies a voltage significantly higher than the motor’s operating voltage to verify the insulation’s integrity under stress. It is primarily used as an acceptance test for new motors or after a major repair. Note: This test can be destructive if the insulation is already weak, so it should be used with caution and according to manufacturer specifications.
Dynamic (Online) Testing
While static testing assesses the motor itself, dynamic testing monitors the motor while it is in operation and under load. This provides a complete picture of the entire motor system, including the power supply, the motor, and the driven load. Since data is collected non-intrusively from the Motor Control Centre (MCC), it is safe and efficient for real-time monitoring.
What Dynamic Testing Assesses:
- Power Quality: It evaluates the incoming power for issues like voltage imbalances, harmonics, and transients. These power quality problems cause overheating, decreased efficiency, and stress the motor’s insulation .
- Motor Performance: By analyzing current levels and balance, it assesses the motor’s efficiency and performance under its normal load.
- Load Analysis: Techniques like torque signature analysis can detect mechanical issues such as bearing faults, misalignment, or load fluctuations (e.g., cavitation in pumps) .
- Rotor Condition: It can identify developing rotor bar faults, often indicated by distinct current signatures.
By combining the findings from static and dynamic testing, you gain a comprehensive view, can cross-reference data, and accurately pinpoint the root cause of a problem.
Mechanical Checks: Ensuring Smooth Operation
Mechanical failures, often in bearings, are a leading cause of motor downtime. Regular checks are essential to prevent these issues.
Bearing Health: Bearings are often the first components to fail. Monitoring their condition is critical .
- Lubrication: Proper lubrication is paramount. Under-lubrication and over-lubrication are equally problematic. Always use the correct type and amount of grease, and avoid mixing different grease bases. Ultrasound lubrication is a best practice for ensuring the right amount is applied .
- Vibration Analysis: This is a powerful tool for identifying mechanical faults. By measuring vibration at specific points, you can detect imbalance, misalignment, bearing defects, and looseness .
Contamination: Protecting the motor from its environment is key. Moisture is a major threat, especially when a motor is de-energized and cools below the dew point, allowing water to condense inside. This weakens the dielectric strength of the insulation and contributes to bearing corrosion. In humid environments, keeping motors warm is crucial . Other contaminants like dust, dirt, and chemicals can also cause abrasion, overheating, and corrosion. Ensure breather drains are clear and cooling passages are unobstructed .
Developing a Comprehensive Maintenance Plan
1. Build a Baseline: When a new motor is installed, perform a full suite of tests (IR, PI, winding resistance, vibration analysis) to establish a baseline of a healthy motor. This data is invaluable for trending and detecting future degradation .
2. Schedule Preventive Tasks: Create a schedule for essential routine tasks:
- Regular Visual Inspections: Weekly or monthly.
- Lubrication: As per the manufacturer’s schedule and based on operating conditions.
- Insulation Resistance Tests: Annually or semi-annually, depending on the environment.
- Vibration Analysis: Quarterly or monthly for critical motors.
3. Integrate Predictive Technologies: Use predictive tools to monitor motor health in real-time and spot issues early.
- Infrared Thermography: Regular thermal scans can identify hot spots in electrical connections, bearings, and windings before they cause catastrophic failure.
- In-Service Motor Analysis: Tools like the Baker EXP4000 can be used for dynamic analysis under real operational conditions to evaluate performance and identify developing faults.
4. The “Repair or Replace?” Decision: When a motor fails, a common dilemma is whether to repair it or replace it with a new, potentially more efficient model. This is a complex decision influenced by factors like the cost of the repair (e.g., a rewind), the expected efficiency loss from the repair, the purchase price of a new high-efficiency motor, operating hours, electricity costs, and potential rebates. A thorough calculation of the annual energy cost is essential for making this decision .
Conclusion
Effective electric motor maintenance is a multi-faceted discipline that blends visual inspections, robust electrical and mechanical testing, and careful lubrication. By shifting focus from reactive fixes to proactive, data-driven strategies, you can significantly improve reliability, minimize costly downtime, and optimize energy consumption. Investing time in training technicians, fostering cross-departmental communication, and implementing a structured maintenance program—like those incorporating a Computerized Maintenance Management System (CMMS)—will pay dividends in the long run, ensuring your plant’s workhorses continue to operate for years to come